The time has come.
You know that idea bouncing around in the back of your mind? That dream, fearlessly waging war against your internal fears?
It’s time to let it out.
It’s time to start your podcast.
The only problem?
You don’t know how to start a podcast. And the thought of wading through a 20,000-word “Ultimate Guide” leaves you with a roaring headache and the overwhelming desire to ditch your podcasting dreams.
Well, no more excuses. This article will teach you everything you need to know about starting a podcast, and it’ll do it without filler, fluff, and long-winded details that don’t really matter.
So let’s dive in, shall we?
Table of Contents
Choose a Topic for Your Podcast
Name Your Podcast

Create Artwork for Your Podcast
Add Music
Get a Microphone (& Other Equipment)
Pick Your Podcast Hosting
Record Your First Episode
Upload Your Podcast Episode
Submit Your Feed to Apple, Spotify, and Google

Promote Your Podcast
1. Choose a Topic for Your Podcast
First things first…
Why do you want to start a podcast?
If your answer is “to get rich and famous,” try again. Podcasting can help you generate business leads, elevate your reputation, and yes, even contribute to your bottom line, but it is a commitment. The rewards come only if you persist.
That means you need to start with a topic you are passionate about. One that you’re so obsessed with, your friends sometimes have to kindly ask you to shut up about it.
If you’re reading this article, you probably already have an idea about that topic. So let’s consider the other half of the equation: your listeners.
The key to choosing a topic for your podcast is to search for that magical zone where your obsessions overlap with your audience’s interests.
So before committing to a topic, look for similar podcasts to see how many followers and reviews they have.
If there are already many popular podcasts in your niche, that’s a good sign: The more people producing and consuming podcasts on a topic, the more viable the topic.
Next, try to come up with a list of 50-100 potential episodes on this topic. If it’s easy for you to brainstorm this list, then that’s another good sign.
But be careful.
You don’t want a topic so broad it won’t appeal to your specific audience. As comedian Bill Cosby once said, “I don’t know the key to success, but the key to failure is trying to please everybody.”
Your core demographic is not “everybody.” Think about your ideal listener and choose a topic that is narrow enough for you to stand out, yet broad enough for you to speak on it for 100+ episodes.
2. Name Your Podcast
Now that you’ve chosen your podcast topic, it’s time to name it!
You want a name that is specific and clear, yet unique enough to catch the attention of your audience.
For example, the Smart Blogger podcast, Break Through the Noise with Jon Morrow, has the flexibility to cover a wider range of topics as it grows. It’s not locked into an overly narrow theme.
As you are brainstorming the perfect name for your podcast, here are some best practices to keep in mind:
Be clear
Ideally, listeners should know what your podcast is about just by its name. This is not 100% necessary, since most podcast platforms include a short description, but sometimes people don’t read descriptions, so better safe than sorry.
Examples:
- Grammar Girl Quick and Dirty Tips for Better Writing
- Japanese Podcast for Beginners (Nihongo con Teppei)
Try to include your target keyword in the title
Apple podcasts is a search engine, and one of the best ways to help it recommend your podcast to the right listeners is to include your target keyword in the title. Just be careful not to keyword stuff! Make it natural.
Examples:
Be consistent
If you already have a brand, or a recognizable name, consider using that in your podcast.
Examples:
- The James Altucher Show is named after influencer James Altucher
- Rich Dad Radio Show with Robert Kiyosaki is named after Kiyosaki and his best-selling book Rich Dad Poor Dad
Combine strategies
Another option is to combine a clear title with your personal, brand, or business name.
Don’t be too long or wordy. You want to make it easy for people to find your podcast. If you still can’t decide on a name, look at other podcast names for inspiration. Check out podcasts inside and outside your niche.
Examples:
But don’t get stuck on this step. Pick a name and move on!
3.Create Artwork for Your Podcast

Your podcast cover art is the first thing people see about your podcast, even before they read your description. So create an image that grabs them.
Your image should communicate the subject of your podcast and hint at your personality. It reinforces your brand, so if you already have a certain look to your site, try to keep it consistent.
Creating an eye-catching cover image
Here are some best practices to keep in mind:
- Use minimal text. The fewer words and characters, the better. Whatever text you use should be readable even at low resolutions, such as 150 x 150 pixels.
- Your cover image should be a minimum of 1400 x 1400 pixels, max 3000 x 3000 pixels for larger screens like the iPad.
- Shoot for 72 DPI (dots per inch) JPG or PNG format, under 500kb size in RGB color space.
How to create your own cover image
If you want to create your own artwork for your podcast, you can use a free service such as Canva. Simply type in “CD covers” (which are 1400 x 1400 pixels) while browsing templates, or create your own design from scratch.
If you want to take it one step further, you can create a vector-based illustration in a program such as Adobe Illustrator. These images remain clear at any size.
Hiring someone to create your cover art
If you prefer outsourcing your artwork, you can hire somebody through Upwork, Fiverr, or 99designs.
Give them the details of your podcast, as well as the podcast image dimension specifications, and any brand colors or images you want to include.
Note: if you are planning to invest time and money in hiring a professional to design your artwork for you, make sure you know what you want and give clear directions.
4. Add Music
Music is another powerful element to include in your podcast.
Most podcasters use a few seconds of intro music, which becomes a familiar “theme song” that listeners associate with the show.
But be careful.
The one and only ironclad music rule is: Never ever use someone else’s copyrighted music.
Instead, look for royalty-free music or buy a one-time commercial license from platforms such as:
- Shutterstock: Offers an unlimited music subscription for a monthly fee. You can also license individual tracks for a one-time price.
- Audiojungle: Hundreds of thousands of tracks, sound effects, and jingles for any of your musical needs. You can buy a subscription or purchase individual items as needed.
- Epidemic Sound: Subscribe (monthly or annually) to get access to tens of thousands of tracks and sound effects, with new tracks added weekly.
- Melodyloops: Buy packets of royalty-free melodies for a set price.
If you’re on a budget, you can ask a musical friend to make you something, or check out these platforms:
- Imcompetech: A collection of thousands of Creative Commons tracks (free to use if you properly attribute the artists and the track title) and paid licenses (if you don’t).
- SilvermanSound: Royalty free music with attribution. You can also get a non-attribution license for a fee.
- Free Music Archive: A collection of music from artists around the world. Free to download under the Creative Commons license.
- Purple Planet Music: Offers royalty free music as well as paid high quality commercial license tracks.
- DigCCMixtr: A music discovery site offering free and paid, commercial tracks.
- Zapsplat: Tens of thousands of free and paid sound effects (and counting!) to use throughout your podcasts.
The downside of getting free music is that you won’t have music that is unique to your podcast.
Your listeners might hear snatches of the exact same track on other podcasts, YouTube channels, etc. So if you want exclusive music, buy it or hire someone to create it for you.
And take the time to find a track that you really like, because as your “signature sound,” you don’t want to change your music once you’ve begun.
5. Get a Microphone (And Other Podcasting Equipment)
Assuming you already have a computer, you’re going to need 2-3 more things to get your podcast up and running:
- A microphone
- Audio editing software
- Other (optional) recording equipment
Your Microphone
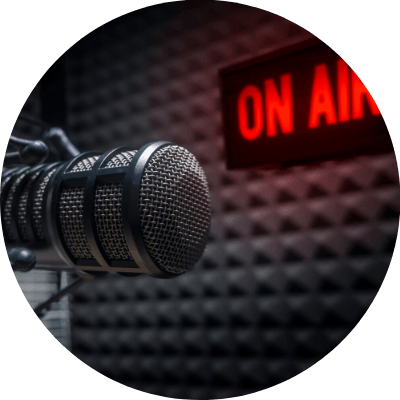
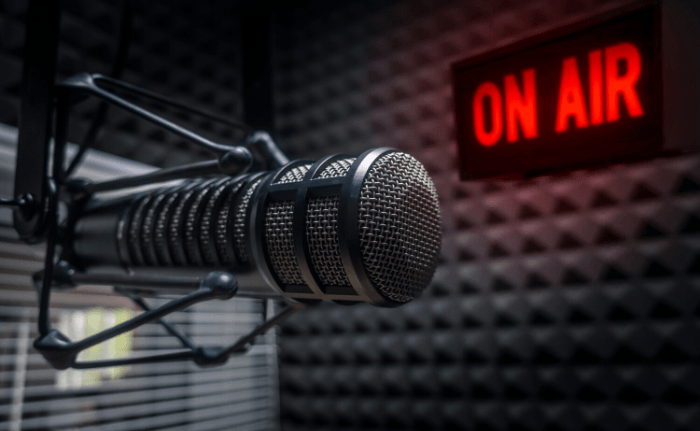
To be a killer podcaster, you need a proper weapon. Ahem. I mean, microphone.
Audio is everything when it comes to podcasting, so if you want to splurge on something, get yourself a good microphone.
And whatever you do, do NOT use your built-in computer microphone. The audio quality is atrocious and there’s not much you can do on the editing end to fix that.
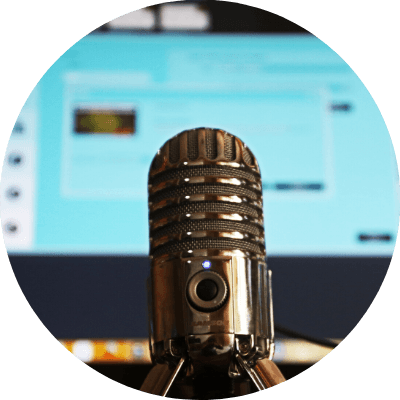
When choosing a microphone, you have a choice between two basic options:
USB vs XLR mics
USB mics are plug-and-play microphones that tend to be cheaper and easier to use, but less customizable than XLRs.
XLR mics require an extra cable and audio interface to work. They tend to be more expensive and higher quality than USB microphones.
An XLR mic + audio interface is the way to go if you have a co-host and need to record more than one person in one room, because plugging in multiple mics into USB ports can mess up your sound quality, and recording more than one person on one mic can make it difficult to edit your audio.
For a microphone that gives you the option of both USB and XLR, check out the Audio-Technica ATR2100x (affiliate link), Blue Yeti (affiliate link), or Samson Q2U (affiliate link) on Amazon.
Your Audio Recording-Editing Software
Audacity is a fantastic audio recording/editing software for beginners.
Audacity works on Windows, Mac, and Linux computers, and can record, playback, edit, and export your audio into a variety of different audio formats (MP3, WAV, FLAC, etc). Plus, unlike Pamela and some of its freemium competitors, Audacity is open-source and free.
If you are a Mac user, Garageband is another free audio software you already have, and if you want to dive deeper into home recording, you can also invest in a Digital Audio Workstation (DAW).
If you need any pro features that Audacity and Garageband don’t offer, Adobe Audition is $20.99 per month, and it’s available for both Windows and Mac.
Other (Optional) Recording Equipment
A pop filter
If it didn’t come with your microphone, you may want to buy a pop filter, a noise protection screen that helps to reduce or eliminate sibilance (hissing noises) and plosives (popping noises).
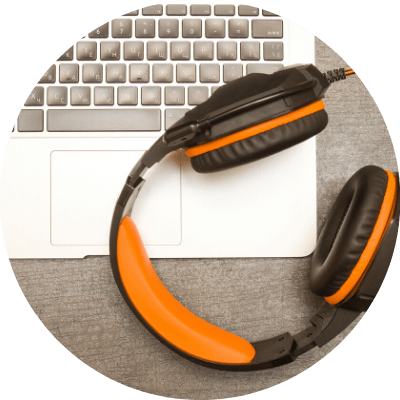
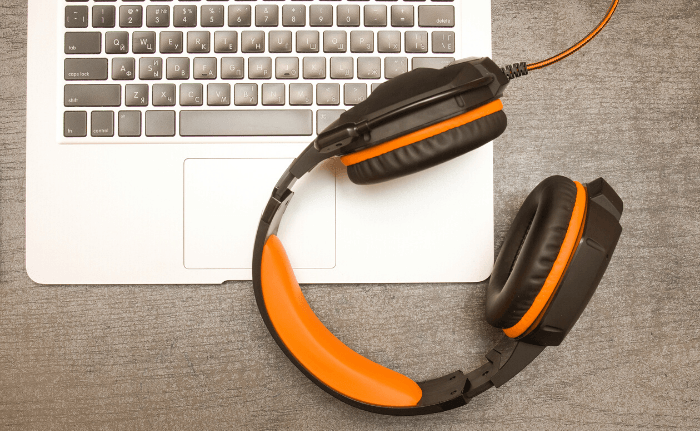
A pair of headphones
Headphones protect your microphone from picking up extra sounds from your computer speakers. They also help you hear what you sound like as you speak, so you can adjust your presentation style.
You don’t have to get fancy, a pair of earbuds will do just fine.
Boom arm
Depending on the microphone you buy, a boom arm (affiliate link) could be a worthwhile purchase. Decent ones are available on Amazon for under $20.
Interview Software
If you plan to talk to people long-distance, you’ll want to invest in interview software, such as:
- Squadcast: This platform offers videoconferencing and records on separate tracks for each speaker.
- Zoom: This easy-to-use tool for remote interviews offers above-average audio quality, but doesn’t save audio to separate tracks.
- Callnote: This software records GotoMeeting, WebEx, Facetime, Skype, Google Hangouts, and more.
6. Pick Your Podcast Hosting
Although you may listen to your podcast via Apple Podcasts, Spotify, Google Podcasts, etc., as a podcaster, you don’t actually upload your episodes directly to those directories.
To share your podcast with your adoring fans, you’ll need a podcast host: a place to store and distribute your podcast’s audio recordings.
Hosts charge a monthly service fee to host your audio files and generate the RSS feed you need to submit your podcast to podcasting directories (so listeners can find you).
How to Pick a Podcast Host
Podcast hosts are (almost) as varied as cell phone providers. When choosing a host, consider these factors:
- Longevity & dependability: Will your host stand the test of time?
- Flexibility & adaptability: What is your host’s storage capabilities?
- Website integrations: Does your host integrate with your website or create a site for you?
- Analytics: How in-depth is your host’s analytics?
- Monetization support: Will your host help or hinder your monetization efforts?
Here are a few podcast hosting services to look into:
Libsyn
Libsyn has been around since 2004, and offers plans with unlimited bandwidth and monetization options, WordPress integration (with their Libsyn Publisher Hub plugin) and detailed analytics.
Podbean
Podbean started in 2006, and offers 24/7 support, distribution to all the major apps and podcast directories, and your own podcast site. Their Unlimited Plus Plan, gives you access to a patron program, advertising capabilities, and video support.
Buzzsprout
Buzzsprout offers an easy-to-use analytics dashboard, making it easy to upload, schedule, fill in meta-details, and submit your podcast to multiple podcast directories.
Blubrry
Blubrry podcast hosting plans start at $12 per month. At that introductory price you get 100MB storage each month and unlimited bandwidth. If you need more, $80 per month will give you 1,000MB of storage space.
Free hosting
Some hosts offer free podcasting plans, but these plans come with limits:
- Buzzsprout allows you to upload 2 hours of content which they host for 90 days.
- Podbean allows you to upload 5 hours of content per month at max 100GB of bandwidth and only basic statistics.
- Speaker’s free plan includes advertisements, you’ll need to pay to remove them.
- Anchor is a 100% free platform focused on “democratizing audio.” But they were the center of a terms and conditions controversy in 2018.
- Soundcloud allows you to upload up to 3 hours of audio only.
So be careful with free plans, and know that if you want your podcast to grow and be competitive, it’s worth investing in a good host.
7. Record Your First Episode
Okay. You’ve prepared your topic, host, and podcast equipment, and you’re ready to roll!
So in this section, we’re going to go step-by-step through the podcast recording process:
Write Your Script
Podcasting is like giving a speech. It’s best if you plan what you’re going to say before you say it, by writing it out.
You don’t have to write everything word for word, but the more planning you do, the less problems you’ll have later.
You can write out a word-for-word speech, if you like, but remember that when you turn that microphone on, you want to speak as if talking to a friend.
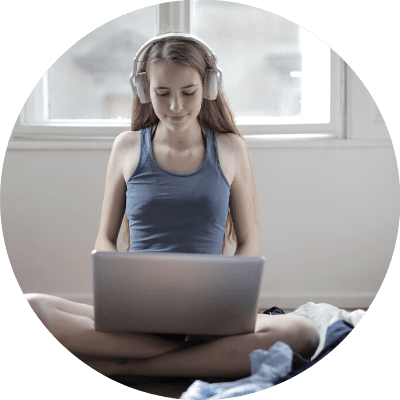
Prepare Your Environment
Before you record your first episode, make sure that you’ve set up the best recording environment.
Remove all distractions (kids, pets, and annoying voice search devices) and choose a room that’s not located near a busy street and doesn’t have many hard reflective surfaces. Use curtains and carpets to absorb noise pollution.
Create Your Intro and Outro
If you plan to create a recurring intro and outro, have that ready to add to your episodes. In your intro, make sure you mention your podcast name, topic, and host name. And your outro is a great place to include your call to action.
Record Your Episode
With your script written and environment set up, you’re ready to start recording!
First, plug in your equipment and open your recording software. Make sure your computer recognizes your mic as the source of audio input, then hit record.
Remember, you don’t have to record a perfect voiceover in one take. Take your time, and feel free to re-record if you make mistakes.
Edit Your Audio (Post-Production)
Editing involves cutting out errors, reducing background noise, balancing sound levels, adding your intro and outro, and making the episode easier for people to hear.
If you used Audacity to record your audio, you can edit your audio file in the programs directly. (To learn how, check out Audacity’s tutorials.)
As always, you can also hire someone to help you with editing, if you prefer.
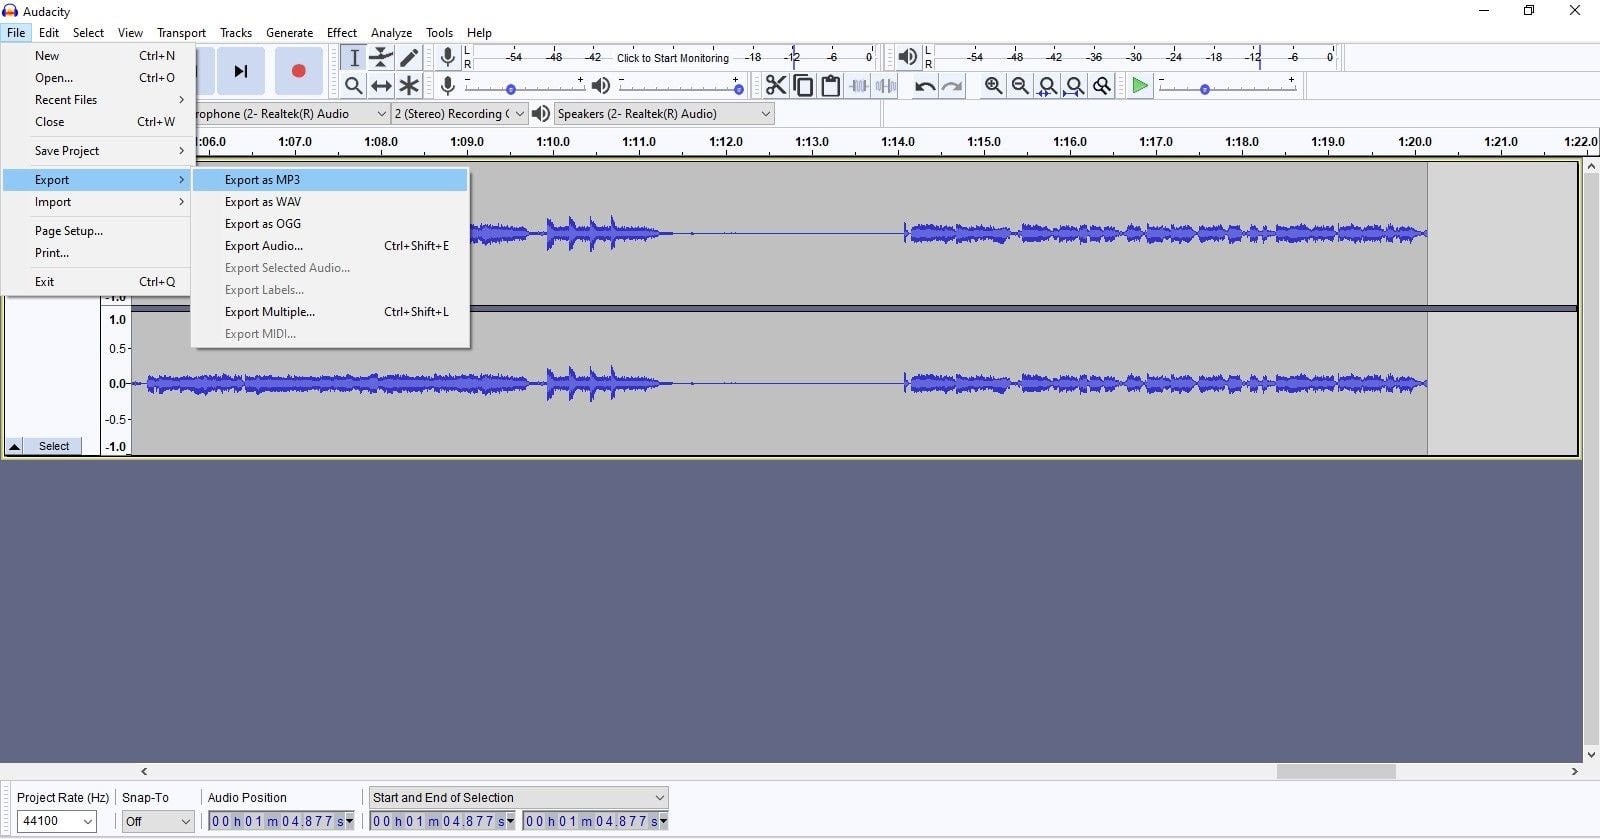
Save Your Recording
When you’re finished recording your audio, save it as an MP3 file. In Audacity, that means clicking on “File” → “Export” → “Export as MP3”:
Name your audio file using a template, something like “podcast name-episode number-episode name-date.”
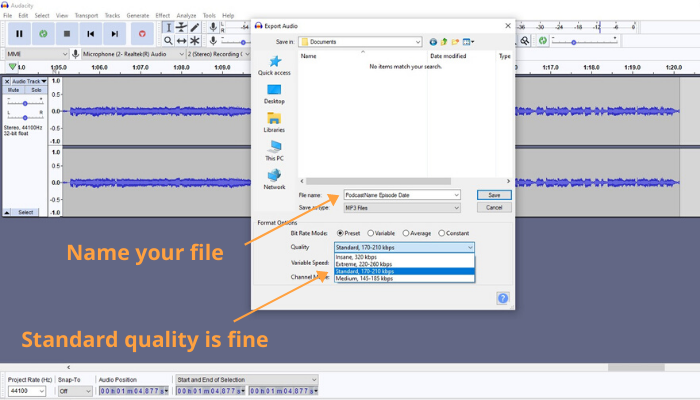
If you’re using Audacity, the default standard quality MP3 should be fine. If you’re using a different service, shoot for a bitrate of around 128 kbps and 44.1Mhz (CD quality).
8. Upload Your Podcast Episode
Once you’ve finished exporting your episode as an MP3 file, it’s time to upload your file to your host. Each host has their own way of doing things, so follow their instructions:
When you do, you’ll be prompted to include ID3 metadata that stores information related to an MP3 file.
You can also include this information when exporting your file from Audacity:
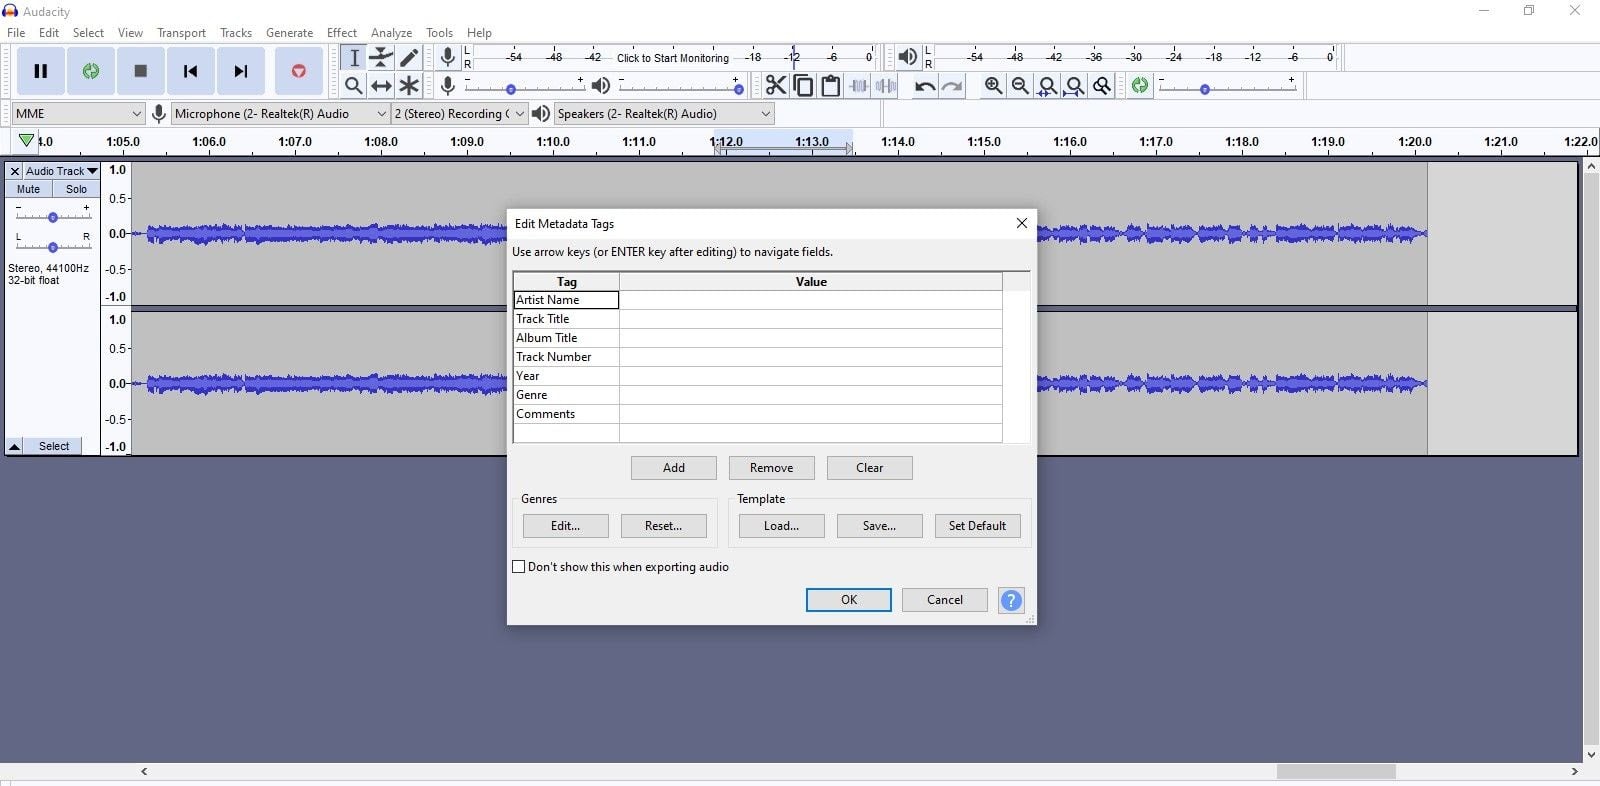
Audacity includes a space for you to add the artist name (in your case, podcast host name), track title (episode title), album title (podcast name), track number (episode number), year, genre, and other comments.
For each podcast episode, you’ll want to prepare an episode title so listeners know what your episode is about. You also want to include show notes, which can include a description of the content (including relevant keywords to make your episode easier to find), timestamps, links to your site, etc.
If this is your first time uploading to your host, you will be asked to include your podcast title, artwork, and description.
Then, once you’ve filled out all the necessary information, your host will pass it on to your podcast directories so that your podcast can be found by future fans.
And speaking of those directories…
9. Submit Your RSS Feed to Apple Podcasts (iTunes), Spotify, and Google/Android

Once you have your podcast created and hosted, submitting it to a directory is easy.
Some podcast hosts have easy one-click-button methods for uploading. If you chose one of those hosts, use their process.
For everyone else, here’s how you submit your podcast feed to the “Big 3” directories:
Uploading Your Podcast to Apple Podcasts
Step 1. Sign in to iTunes Connect using your Apple ID (if you don’t have one, you can create one for free).
Step 2. Click on the Podcasts Connect button.
Step 3. Enter your podcast RSS feed URL (which you get from your podcast host) and click “validate.” Click Submit to continue.
Step 4. Apple will review your podcast and you’ll be notified via email when it is approved.
Uploading Your Podcast to Spotify
Step 1. Go to Spotify for Podcasters and log in to your account (or create one if you don’t have one yet).
Step 2. Once you are logged in, go to the “Add your podcast” page and click “Get started.”
Step 3. Enter your RSS feed and click Next.
Step 4. Add relevant info to the “Add podcast info” page, review, and submit.
Note: It can take a few hours up to 5 days for your podcast to appear on Spotify, so be patient. Also, Spotify requires audio to be in MP3 audio with bitrates between 96-320 kbps and episodes no more than 200MB (about 83 minutes at 320kbps or 200 minutes at 128kbps).
Uploading Your Podcast to Google/Android
Step 1. Go to the Google Play Music website and click Publish.
Step 2. Sign in using your email, and submit your podcast URL.
Step 3. Once you are approved, your podcast will be listed on Google Podcasts.
Other Podcast Directories
While Apple, Google, and Spotify are most popular podcasting directories, you can also upload your podcast to other platforms, including Stitcher, TuneIn, Overcast, etc. The more places you are, the easier listeners can find you.
10. Promote Your Podcast

To compete with 800,000 (and counting!) podcasts worldwide, you’re going to have to do more than cross your fingers for luck to get people to listen.
But good news…
Promoting your podcast is totally doable. Here are some ideas to do just that:
Launch your podcast with a splash!
Before you launch your podcast, generate buzz.
Send an announcement to your friends, family, and followers on your mailing list. Include the announcement in your email signature.
Tell people in real life and on social media about the impending launch of your awesome new podcast.
Create a pre-launch team, like authors do with book launches, to create a snowball effect and enhance anticipation for your podcast.
On Debut Day, launch several episodes at once, ideally 3-5, so that listeners can immediately binge-listen to several episodes without waiting.
Ask everyone you know to subscribe and leave a review, and reward them by reading top reviews or thanking people by name on new episodes of the podcast.
Create audiograms for each episode
An audiogram is a snippet of your podcast episode that you can share on social media to pique the interest of potential listeners.
You can use the Wavve or Headliner app to easily create a visually appealing audiogram to share on your Facebook, LinkedIn, and other social media channels. Both have free plans as well as premium options.
Utilize your website
If you don’t already have a self-hosted website, you should consider creating one because you can leverage that site to share your podcast, blogging content, create and sell products and courses, etc.
(Just be sure your podcast website is SEO friendly so Google will give it some love.)
If you already have a website, make sure you promote your podcast on that site. For example, you can repurpose your podcast episodes into blog posts by transcribing and editing your audio.
Feature your podcast on your homepage and About page, link to specific podcast episodes within your blog posts, and embed a podcast player on your site for visitors.
Be a guest (and invite guests onto your show)
To supercharge your promotion, try to be a guest on other, more established podcasts in your niche, and invite podcast hosts/influencers to be a guest on your show. This will introduce your podcast to an audience that is already interested in your topic.
Podcast listeners often find new podcast recommendations while listening to their favorite shows, so the more you network, the better.
Never stop promoting!
The best way to promote your podcast is by word of mouth.
So bring up your podcast whenever it makes sense. Talk about it with your friends, share it in social media groups, and write about it to your email list.
Most of all, produce a remarkable podcast that people will want to share with their friends. If you consistently create valuable content on a regular basis, your audience will come to you.
Bonus: Podcast Q&A

What equipment do I need for a podcast?

It doesn’t take much to start a podcast:
At minimum, you will need a computer, microphone, and pair of headphones.
For software, you can download Audacity to record and edit your audio, and use Zoom, Skype, etc., to do long-distance interviews.
How much does it cost to start a podcast?
Technically, you can start a podcast for free, if you already have the hardware you need.
But if you want to reap the long term benefits of podcasting, you’ll want to pay for a good podcast host (recurring fee) and decent microphone (one-time fee).
Ultimately, you get what you put into it: If you just want to test out the waters, you can get started for free and see how it goes. If you’re committed for the long haul, do your research and invest in quality.
How long should podcasts be?
When deciding on your podcast length, consider your content, audience, and podcast format.
Don’t stuff your podcast with fluff just because you’re trying to hit an arbitrary time mark, and don’t lop off interesting material because the podcast is getting “too long.”
But do try to keep your episode lengths uniform.
If you want to make a 30-minute podcast, don’t throw in a 3-hour or 3-minute-long episode. Keep each episode at similar lengths so readers know what to expect.
How often should you publish a podcast?
Podcast episode releases range from daily (NPR’s Here & Now) to once in a blue moon (Hardcore History with Dan Carlin).
A general rule of thumb is to go with a schedule you can stick to. And be consistent. If you post erratically, you risk losing listeners.
What if I hate the sound of my voice?
Check out Sonia Thompson’s 7 Ironclad Reasons to Podcast (Even If You Hate the Sound of Your Own Voice).
Is there any reason I should NOT start a podcast?
Maybe. You’ll have the most success with podcasting if you’re focusing solely on it. So if you’re still trying to master freelance writing, blogging, or even a YouTube channel, you’re better of mastering it first.
Jon dives into this topic in great detail here: Why You Shouldn’t Start a Podcast or YouTube Channel (Seriously).
Can you make money from podcasts?
The short answer is yes. However, the money doesn’t always come straight from your podcast, but from the awareness and traffic your podcast can create.
That said, with a large audience, you can earn money through sponsorships and affiliate marketing, or by advertising your own products and services to your audience.
Some podcasters also generate income through donations or premium paid audio content.
Go Forth and Podcast!
Most people who think about starting a podcast never get started.
Don’t be one of them.
Just get started, and take it one step at a time.
This article can teach you how to get off the ground, but the passion to spread your message? You already have that.
So what are you waiting for?
We can’t wait to hear what you have to say.


I love blogging, but only did a couple of podcasts. My viewing (listening) numbers were non-existent and in the time it took to edit I could have written a couple of blog articles.
Hi Joanne,
Podcasting and blogging are both great ways of getting content out there, but sometimes one or the other is more suitable for certain folks at certain times. Did you leave the podcast up? What was it about? 🙂
I must admit that I’ve been slacking on my podcasting game for quite a number of years. I know that voice combined with blogging immediately attracts traffic and increases in revenue potential. Blog Talk Radio is one of the known podcasting sites out there that allows people to start free radio channels. Which podcasting site that you have success on? 🙂
Hi DNN!
I think your content choice depends on you. If you enjoy speaking and creating audio content, then you definitely have to look into podcasting. Others prefer video, in which case Youtube might be the way to go! 🙂
I will launch my podcast within next week. This blog really helped me in creating my podcast